
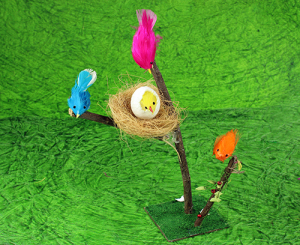
Hello All!! Welcome to another tutorial by Itsy Bitsy. Today, we shall learn to make a beautiful & delicate bird’s nest. It is an easy DIY project and perfectly suitable for spring & summer. Bring the outdoors inside with this crafty project. Add different coloured birds to make this more colourful & vibrant. 🙂 🙂

Materials Required
Neem stick/Flower making stem (5mm)
Flower making wire
Feathers
Colours
Coconut fibre
Crystal
Pompom
Thermocol ball
Handmade paper
Cardstock
Green saw dust
Silicon glue
Scrapbooking glue
Brush
Method
 |
|
Step 1: Take a neem stick/ flower making stem and glue it on a cardboard using silicone glue.
|
 |
|
Step 2: Take another stem and glue it to the side of the base stem using silicone glue.
|
 |
|
Step 3: Place another stem on the side and wrap a flower making wire around it. You can also stick small leaf like cut outs on it. Handmade paper can be used to make the leaves.
|
 |
|
Step 4: Glue small wooden beads on the wire (To resemble fruits).
|
 |
|
Step 5: Glue green saw dust to the base with the help of craft glue.
|
 |
|
Step 6: Glue some natural coconut fibre (like a nest) in between the stems.
|
 |
|
Step 7: Take a 2 inch thermocol ball & scoop out the middle part.
|
 |
|
Step 8: Glue tissue paper on to the ball using craft glue
|
 |
|
Step 9: Paint the ball white.
|

 |
|
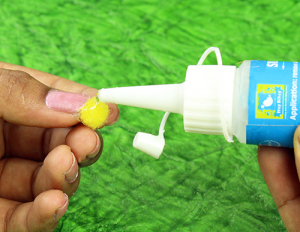
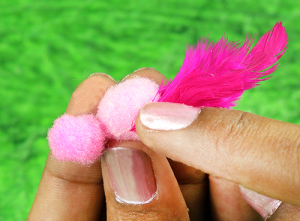
Step 10: Glue a pompom & cover it with feathers (You can cut the feather to get the desired size).
|
 |
|
Step 11: Make the eyes & nose (to resemble a bird) using black crystals & handmade paper cutouts, respectively.
|
 |
|
Step 12: Place the bird inside the thermocol ball.
|
 |
|
Step 13: Place the thermocol ball on the nest.
|

 |
|
Step 14: Make similar birds using pompom & feathers of different colours.
|
 |
|
Step 15: Place the birds using craft glue.
|
The crafty bird’s nest is ready. Use it for school projects or for a fun activity during the summer holidays. Happy crafting!! Let us know what you thought of it.
Links :
Neem stick/flower making stem (5mm) – http://www.itsybitsy.in/store/index.php?main_page=index&cPath=3000_3003
Flower making wire – http://www.itsybitsy.in/store/index.php?main_page=advanced_search_result&search_in_description=0&keyword=Flower+making+wire
Handmade paper – http://www.itsybitsy.in/store/index.php?main_page=advanced_search_result&search_in_description=0&keyword=handmade+paper
Cardstock – http://www.itsybitsy.in/store/paper-boards
Coconut fibre – http://www.itsybitsy.in/store/general-craft/coconut-fibre/coconut-fibre-natural-20g-pbhc-ib
Thermocol ball 2” – http://www.itsybitsy.in/store/scrapbooking/paper/12inch-x-12inch/nanas-nursery-baby-girl-12×12-des-11-1sheet-dcwv
Green saw dust – http://www.itsybitsy.in/store/index.php?main_page=advanced_search_result&search_in_description=0&zenid=titu01qfdg6imf5jcpirlcpno2&keyword=saw+dust
Wooden bead – http://www.itsybitsy.in/store/scrapbooking/mdf/alpha/mdf-alphabets-lower-case-4-inch-n-1pc-ib
Silicon glue – http://www.itsybitsy.in/store/adhesives/silicon-glue
Scrapbooking glue – http://www.itsybitsy.in/store/craft/tools-equipments/punches/craft-punch-flower-32mm-km-8204-12-1pk-ib
Tissue paper – http://www.itsybitsy.in/store/index.php?main_page=advanced_search_result&search_in_description=0&keyword=2SHEET+PBHC+IB
Too good. I bought feather from itsy-bitsy but was looking for this ideas and your post pop up. Thanks for sharing
You are welcome 🙂 Do share your creation with us on facebook – https://www.facebook.com/itsybitsyindia