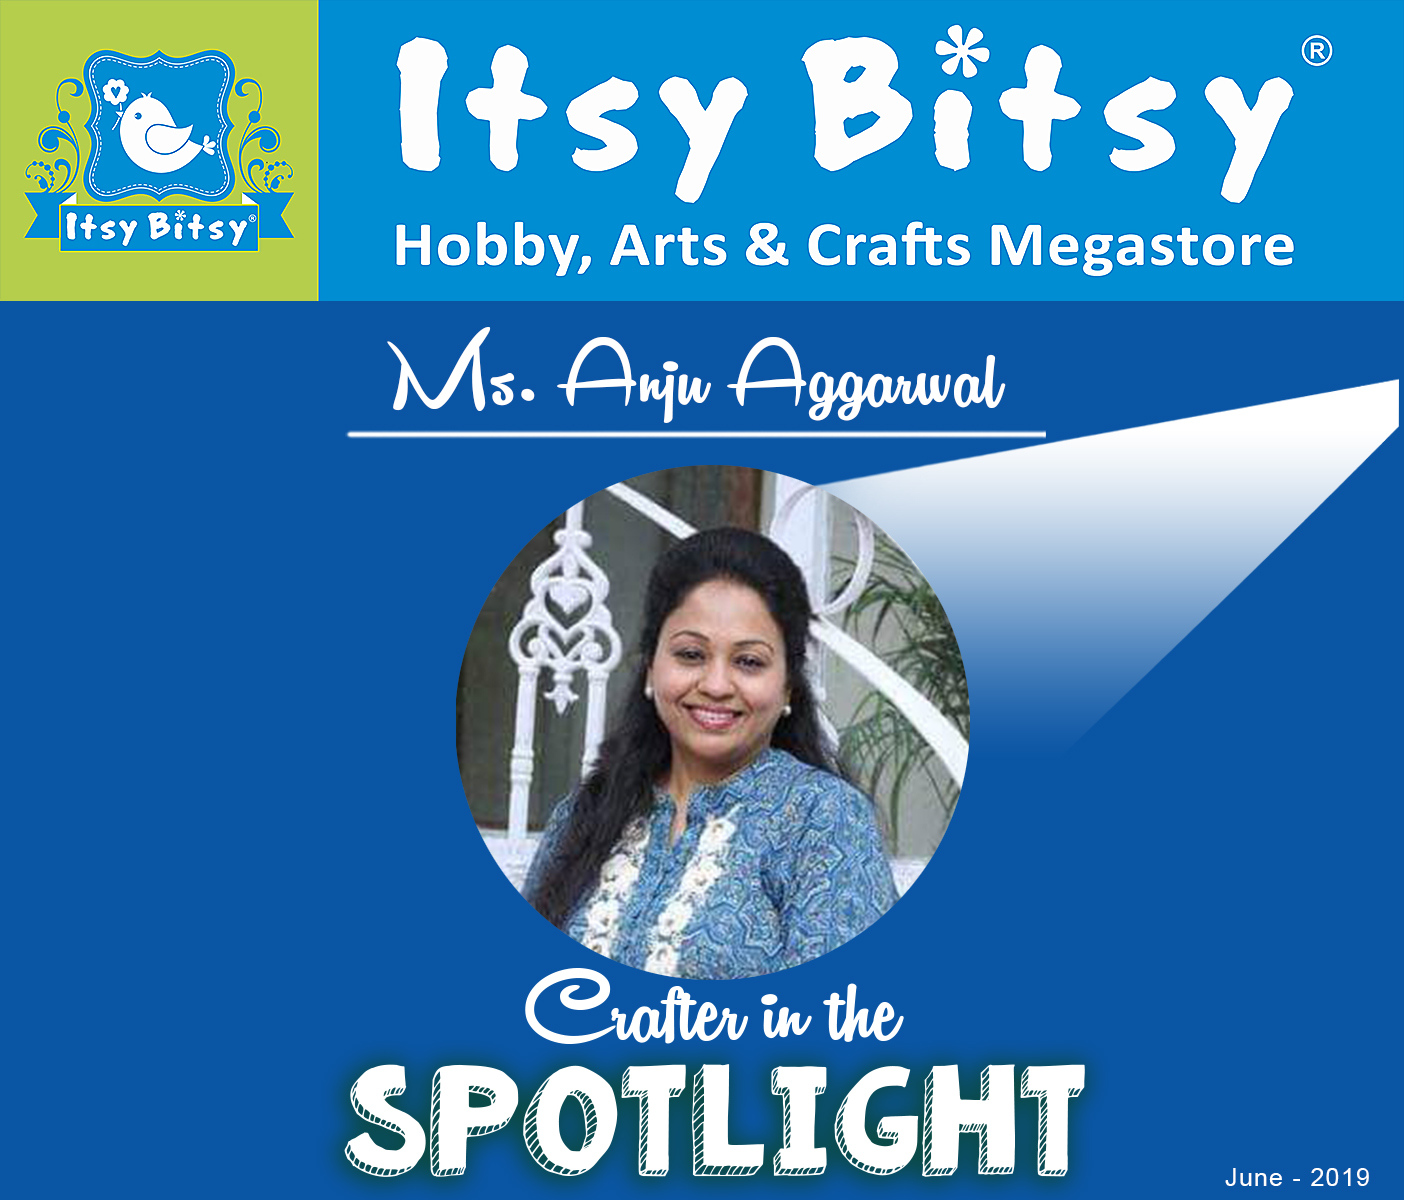
Hello creative folks! This week the spotlight is on a passionate crafter Anju Aggarwal, from Delhi. Let’s read about her creative journey and see what her favourites are.
Anju was enthusiastic about art and crafts since her childhood days but took up serious crafting a few years back. She loves playing with colours and says crafting is like meditation to her. For her, handmade is a way to show love. She is also a fashion designer and a creative enthusiast with a wide range of interests.
Read along to find out Anju’s favourite craft forms, her arty-crafty wish, craft essentials she can’t live without, how she describes her style of crafting, what she enjoys most besides crafting and more. Also, catch glimpses of a step by step project by Anju. Don’t forget to leave your loving comments for her.

Rashmi Closepet M.D Itsy Bitsy: What are your favourite craft forms?
Anju Aggarwal: Decoupage and Mixed Media
RC: If you are granted an arty-crafty wish, what would you ask for?
AG: I wish to become a renowned name in the field of art & craft.
RC: How did you come to know about Itsy Bitsy?
AG: Few years back my daughter was studying in NIFT Bangalore, so whenever I visited her she used to take me to Itsy Bitsy. She was the one who introduced me to this brand.
RC: Tell us about your most exciting shopping experience at Itsy Bitsy.
AG: First time when I visited Itsy Bitsy, Pitampura store, I was glued inside the store for more than 2 hours. I was amazed with the collection of arty supplies they had. I actually wanted to buy everything! Finally, I walked out with 3 big bags full of mind blowing crazy stuff from the store.
RC: What craft products attract you the most?
AG: There is endless number of things that I love buying from Itsy Bitsy. But to name a few – Chalk Paints, Stencils, Stamps, Chipboard Cutouts and so on.
RC: What is your ideal crafting time in a day?
AG: Crafting is like meditation for me. So mostly I design all my new products at night when there is peace all around.
RC: What are your ‘Can’t live without’ craft essentials?
AG: Chalk paints – I love playing with colours!!
RC: How long have you been crafting?
AG: Since my childhood. I was very good in art & craft but I am pursuing seriously for the last 3 years.
RC: Which 3 words describe your crafting style the best?
AG: “Made with Love”
RC: Any inspirational tips for newbies and craft enthusiasts?
AG: Create your own style & be an inspiration for others.
RC: Any tips for fellow crafters to help them organize their workspace better.
AG: Craft supplies need a lot of space for storage so I have purchased a big rack with multiple drawers to store all my craft essentials in a more organized manner.
RC: What inspired you the most in your creative journey?
AG: My husband has been my inspiration as he is the one who motivated me to get back to pursue my passion at this age.
RC: According to you what’s the best way to overcome a creative block?
AG: Listening to music helps me clear my mind.
RC: Why do you think people should continue with ‘Handmade’?
AG: My daughter got married this December. I packed all her trousseau with handmade stuff and on all special occasions I gifted handmade gifts to her in-laws. To me “Handmade means expressing love”.
RC: Other than crafting what do you enjoy the most?
AG: I love watching movies in a theatre.
RC: Which are the product categories you check out most often in new arrivals?
AG: Mixed Media products.
Here is a step by step project by Anju
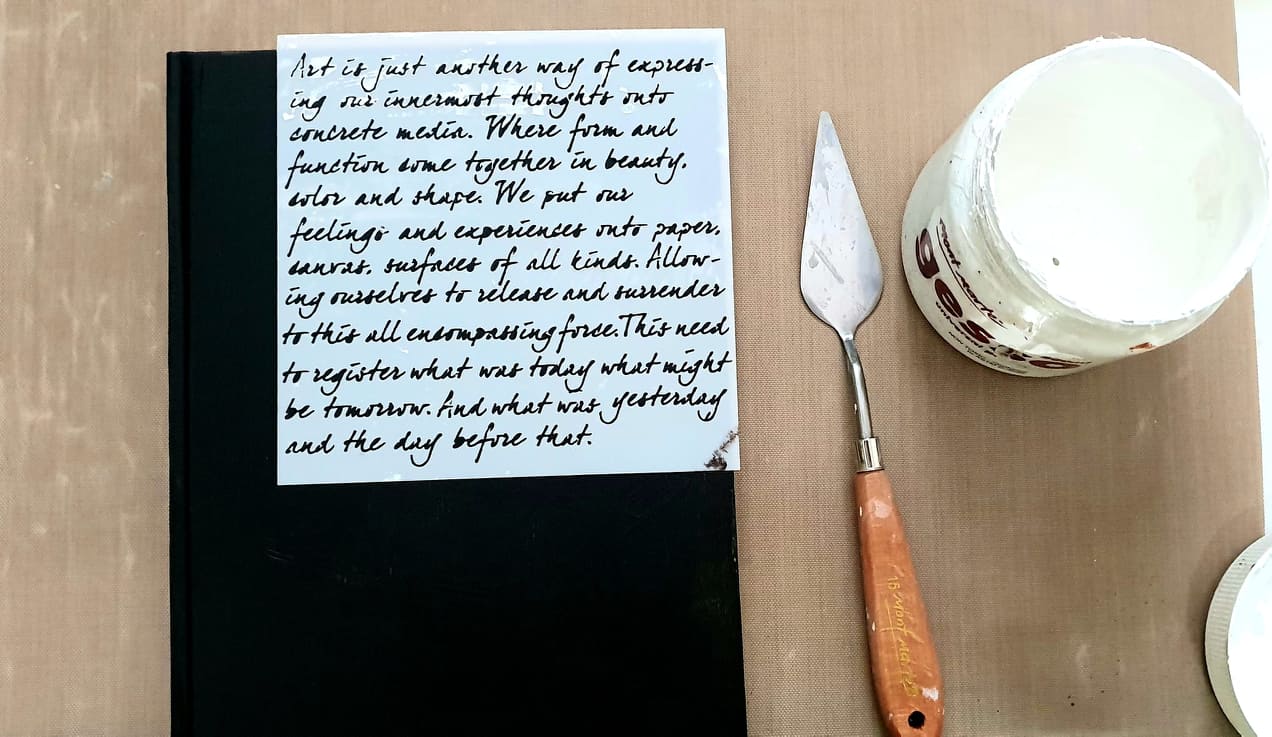
I have named my creation – “LIFE IS BEAUTIFUL”, as this phrase reflects my personality. I believe “life is about moments, don’t wait for them, create them”.
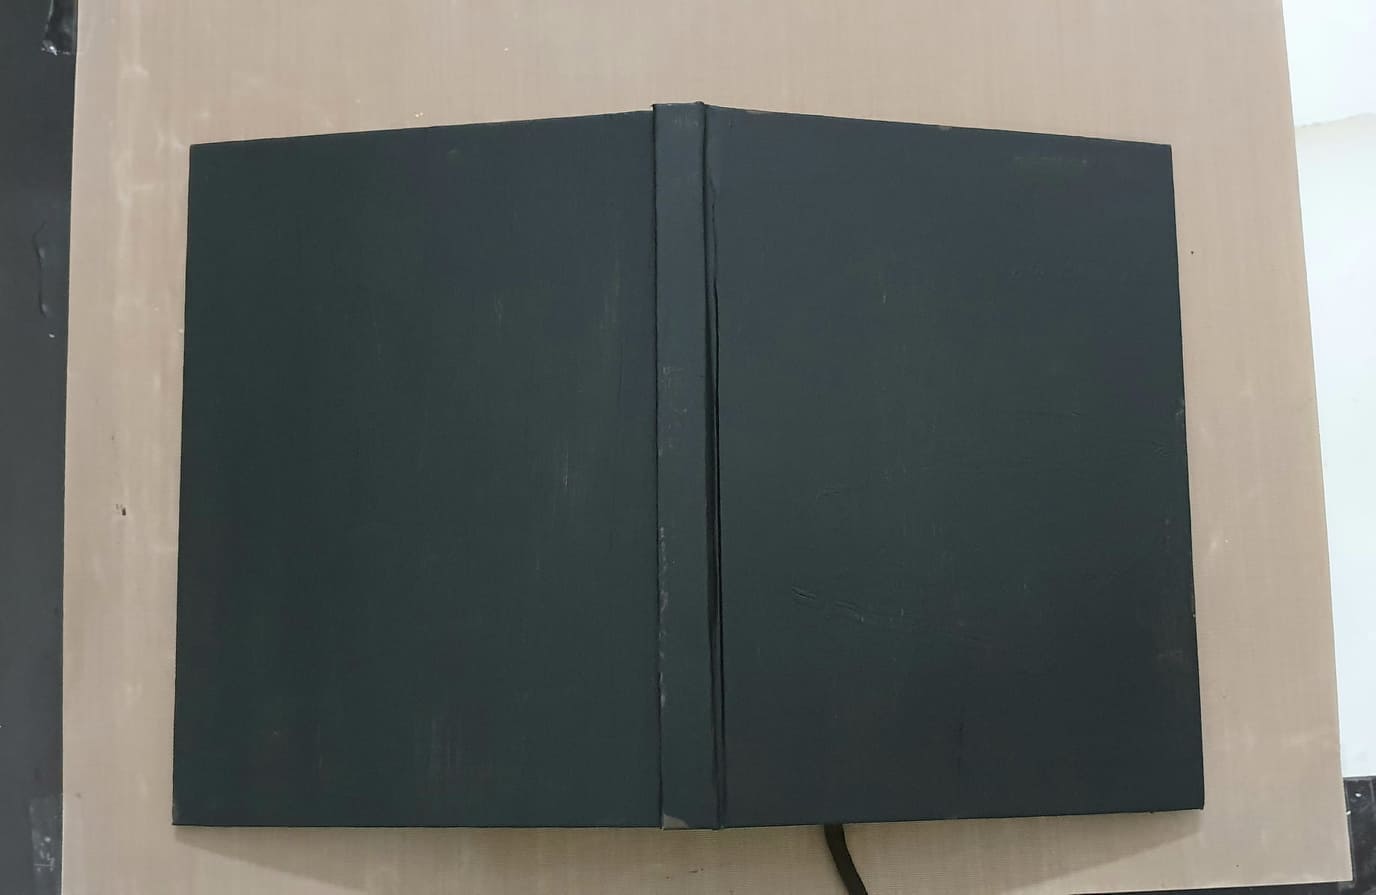
I have created a beautiful Vintage Mixed Media Book cover.
Today I’m going to share a picture tutorial for the same with you all, explaining all the techniques and products used step by step.
Before we begin just a brief introduction to mixed media –
Mixed media is simply mixing of two or more media elements, like pastes, waxes, gels etc., mainly used in 3D projects, scrapbooking.
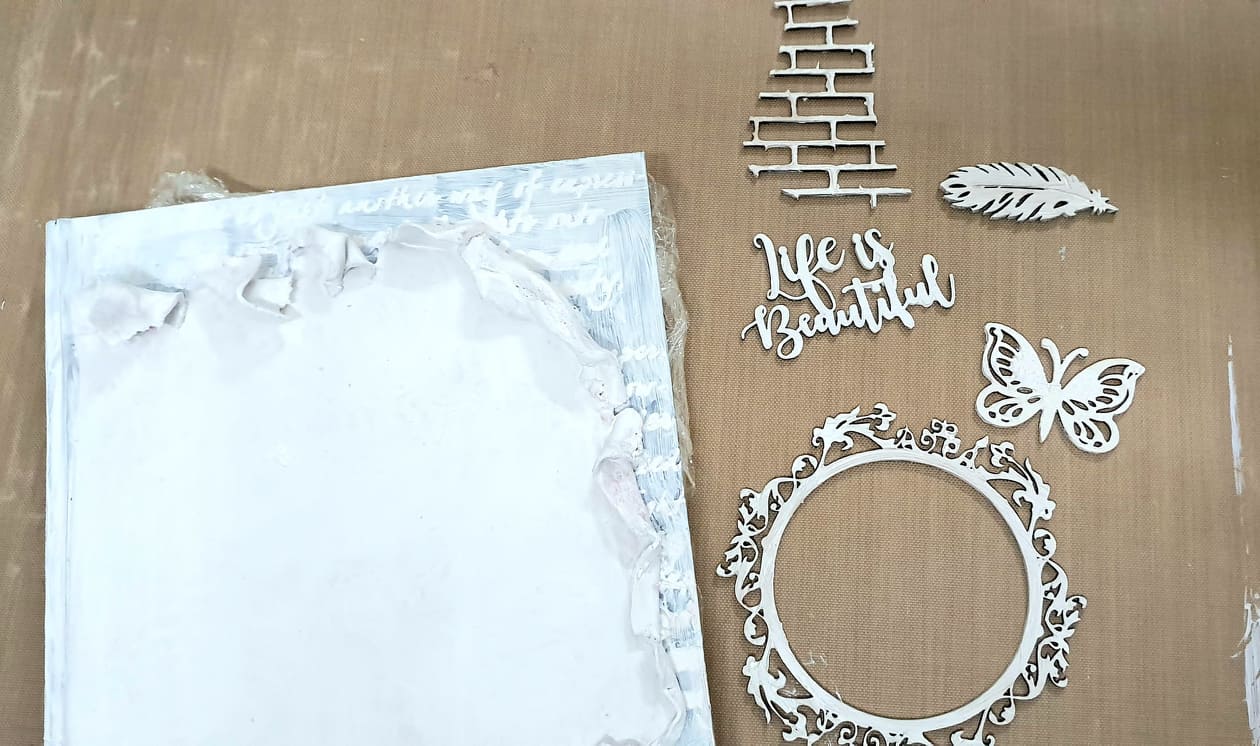
Step 1 – I have taken a hardboard diary, we can get it easily at any stationary shop. I have applied Black Gesso on both sides of the base (front & back).
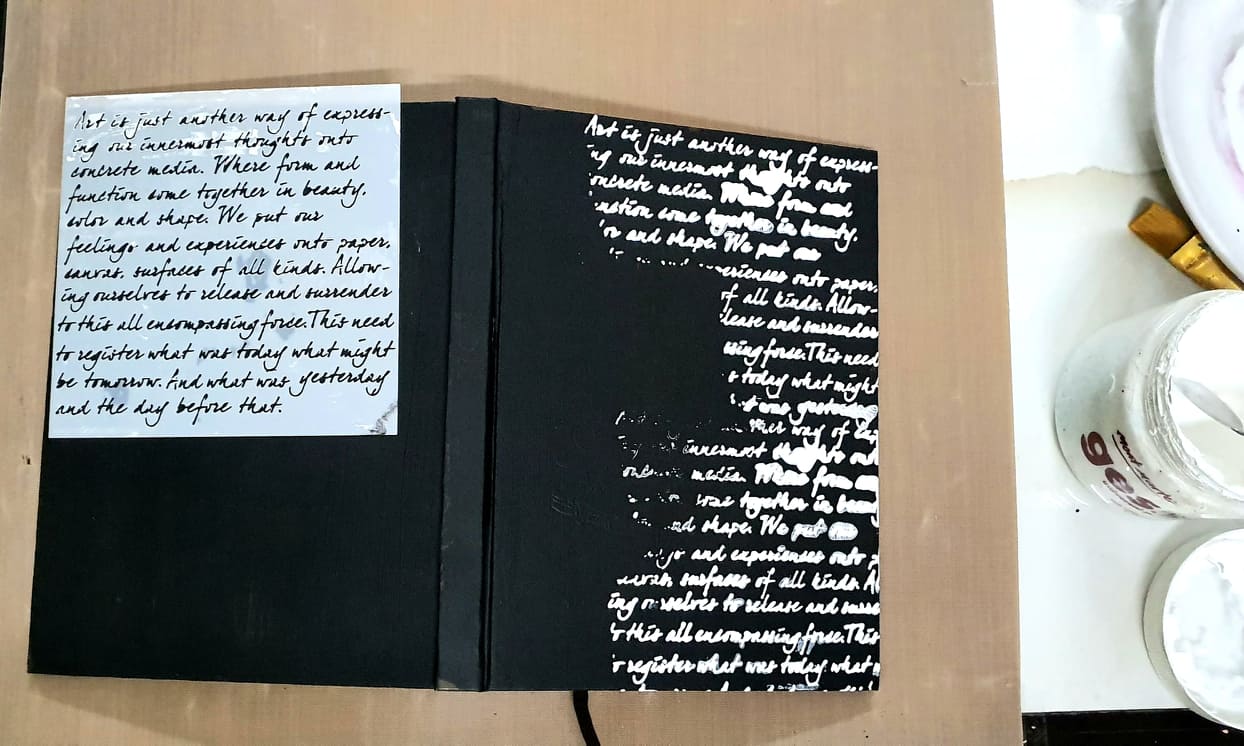
Step 2 – I used a script stencil with White Gesso to give some interest on the base. Then leave it to dry completely.
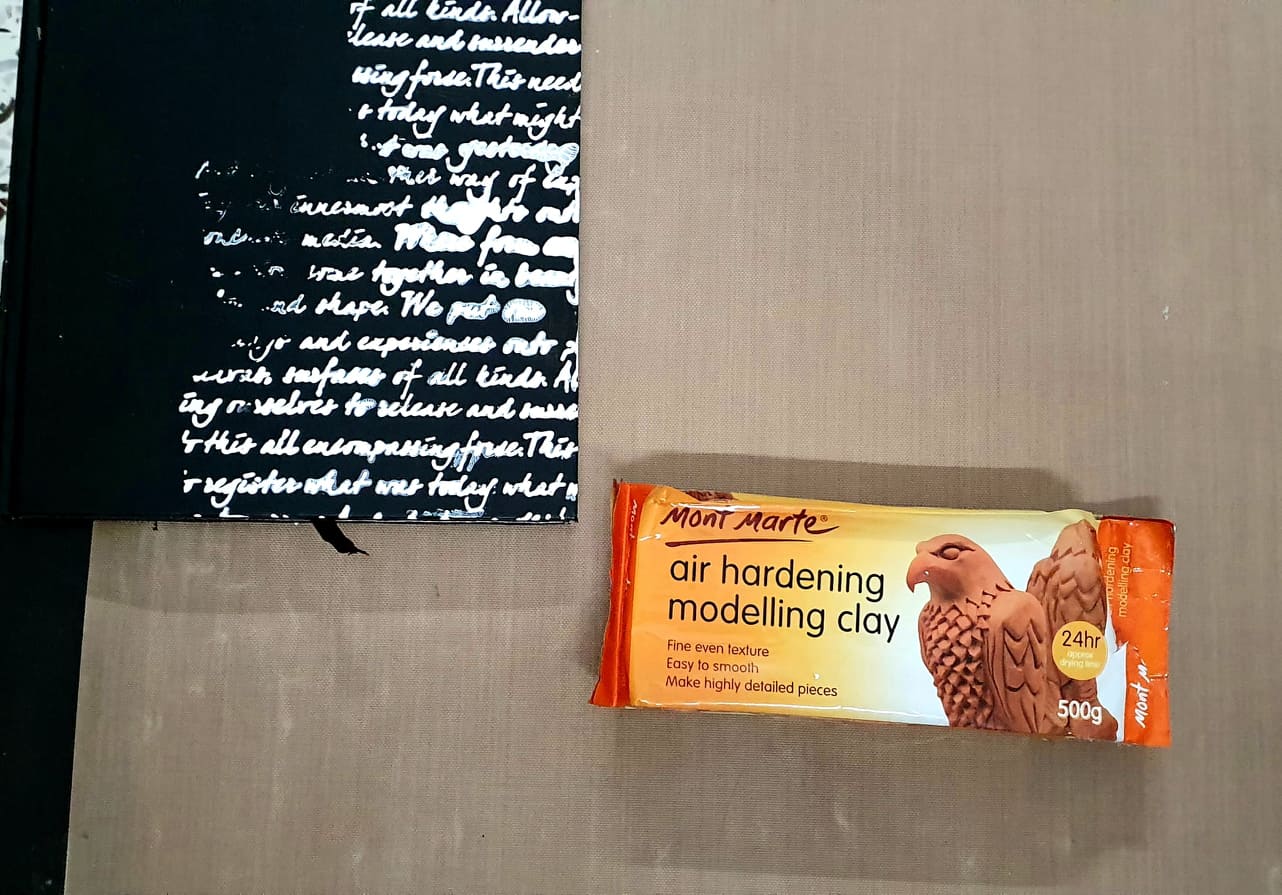
Step 3 – Now we need ‘Air Hardening Modelling Clay by Mont Marte’, take out a big chunk of clay (don’t forget to seal the rest of the clay properly to avoid drying).
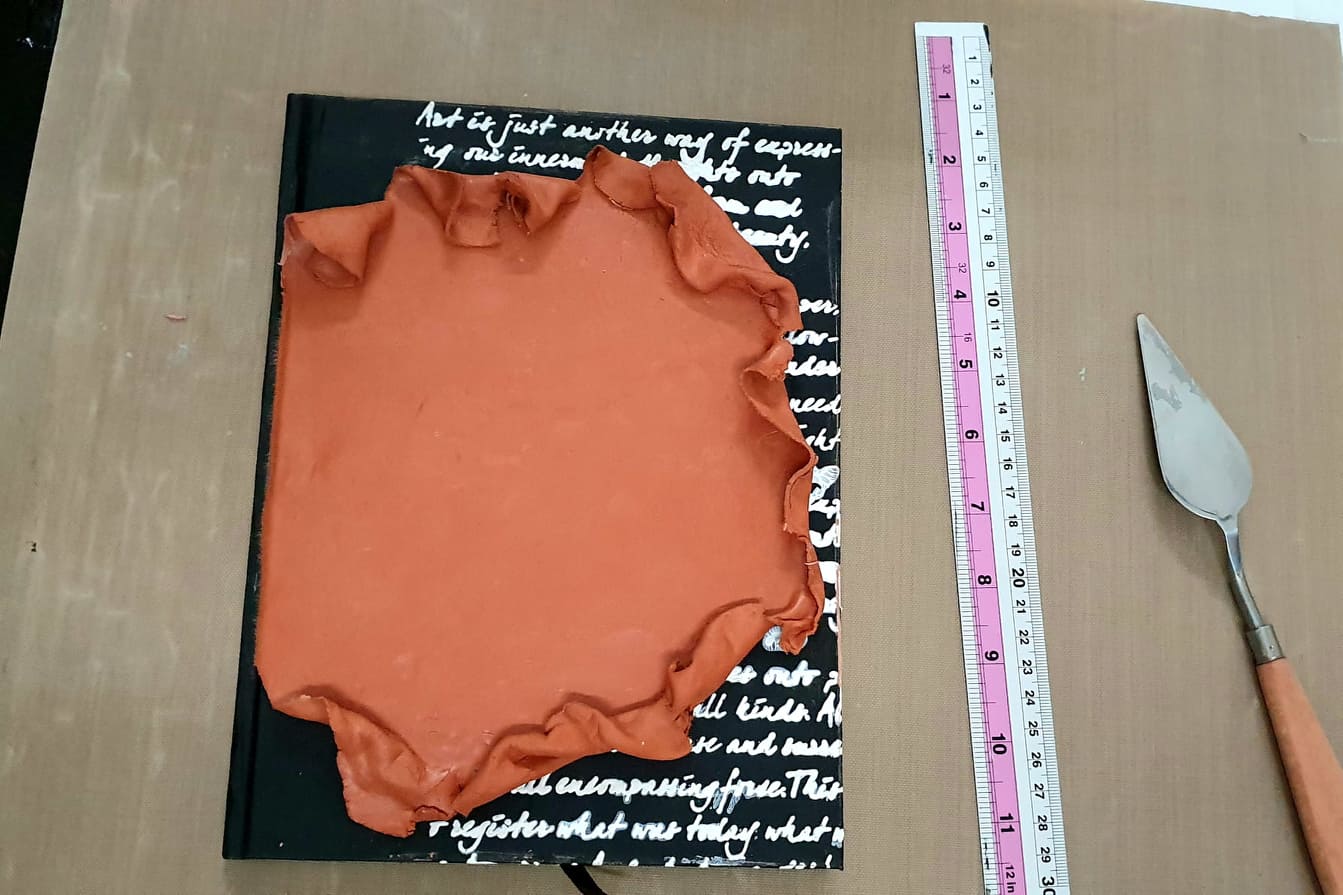
Step 4 – Bind the clay dough for few minutes in hand to make it little soft and smooth. Then roll it on table with a rolling pin to spread it to book size equally.
Place it on book and tear the edges and roll randomly giving a torn burnt look of a page.
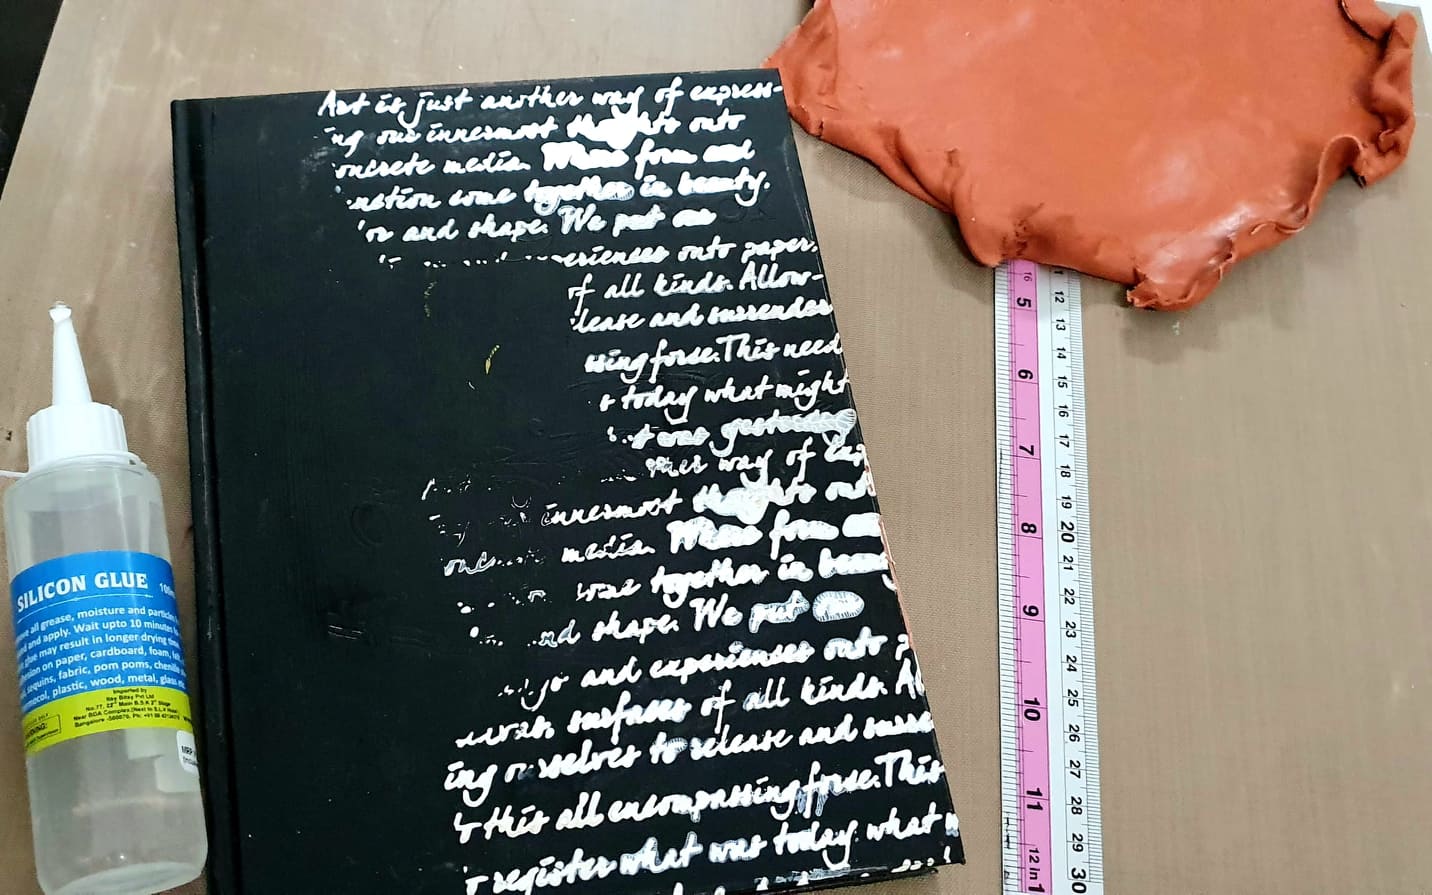
Step 5 – Once you are satisfied with the edges, stick the clay with Silicon Paste on the front cover and leave it to air dry for 24 hours. It will start drying after few hours but we need to let it dry completely before painting. Waiting for so long needs a lot of patience. It’s so hard to resist once you start the project, but patience is very important in any art form.
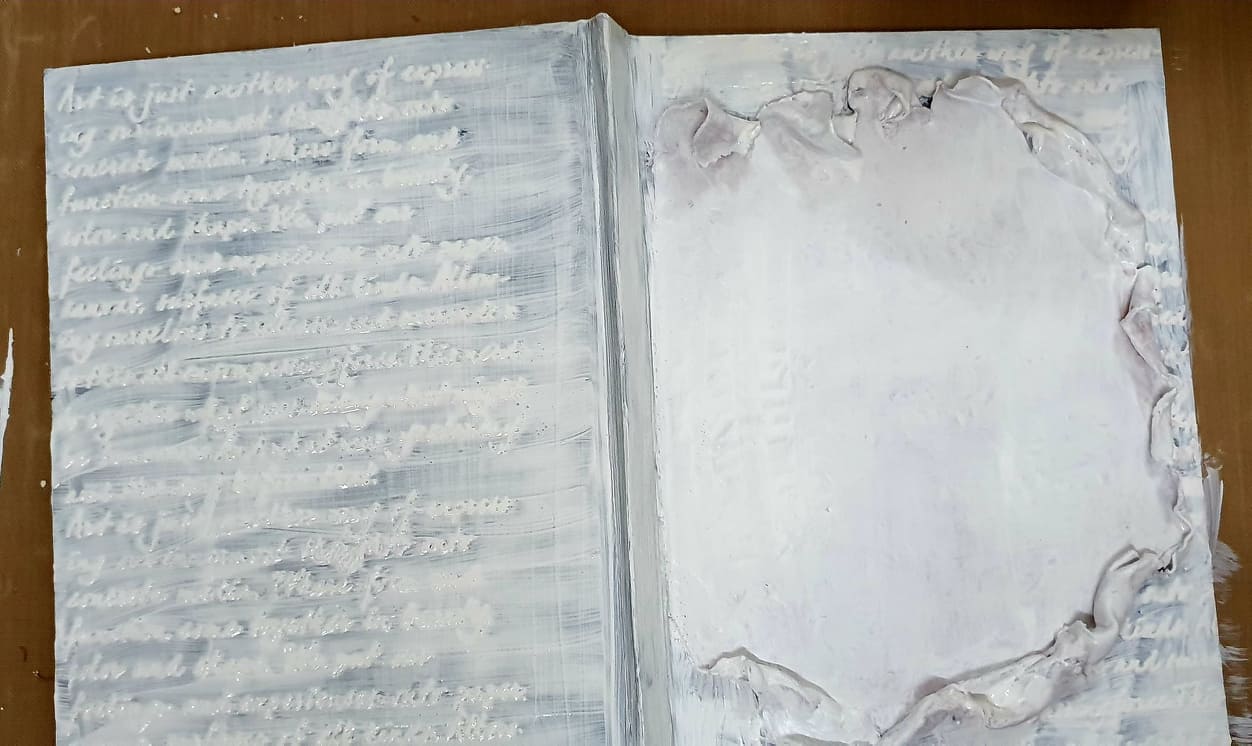
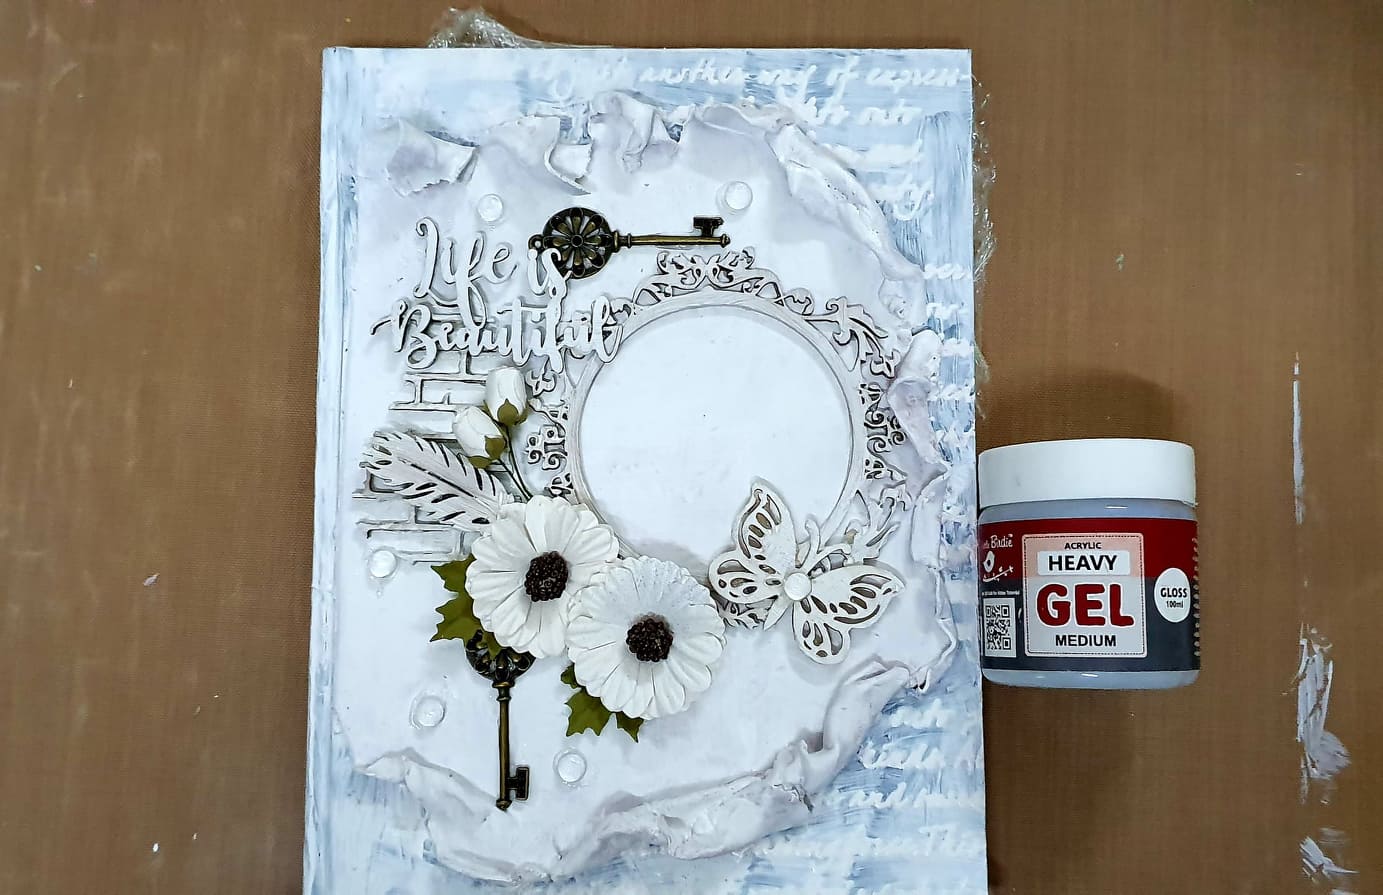
Step 6 – Now coming back to the project after its completely dried, we need to secure the pages first, I have wrapped the pages with shrink wrap. I have covered the base and my embellishments with White Gesso. We can dry this layer with heating tool.
Step 7 – Arrange the embellishments as you wish and stick them with ‘Heavy Gel Medium’, we will place the photo once we finish the colouring part.
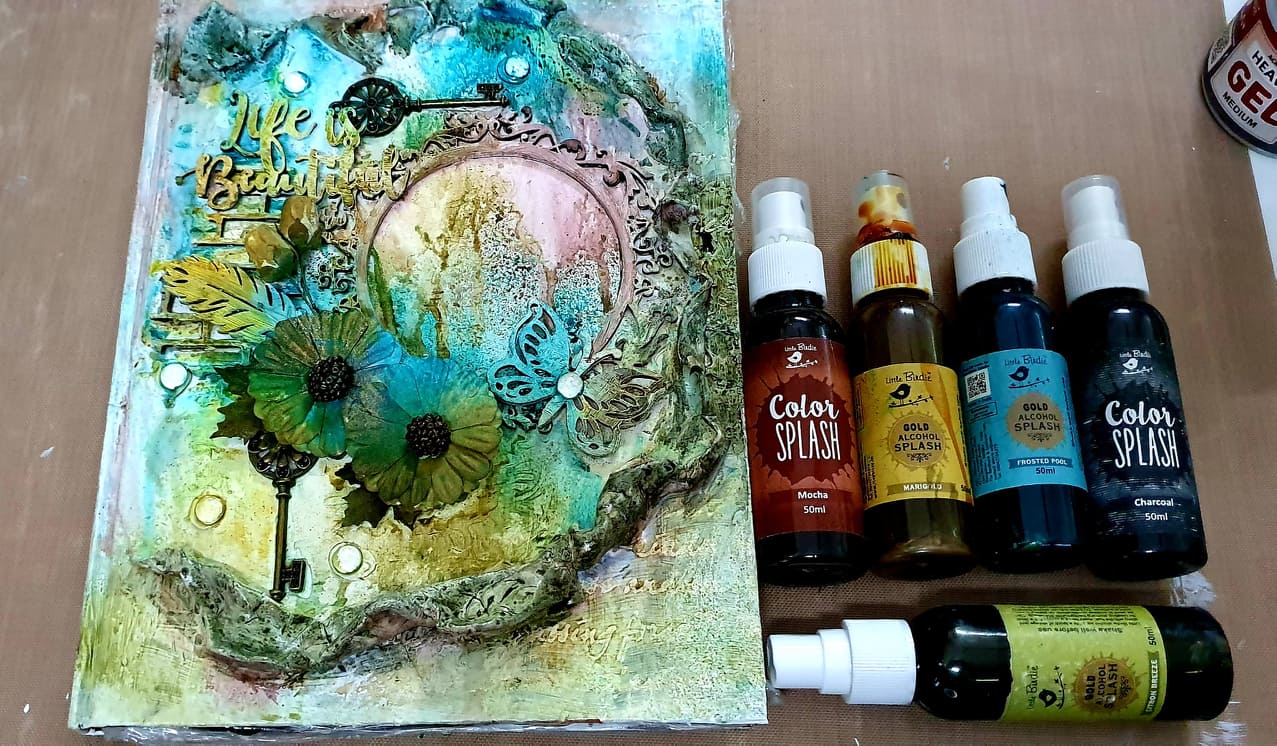
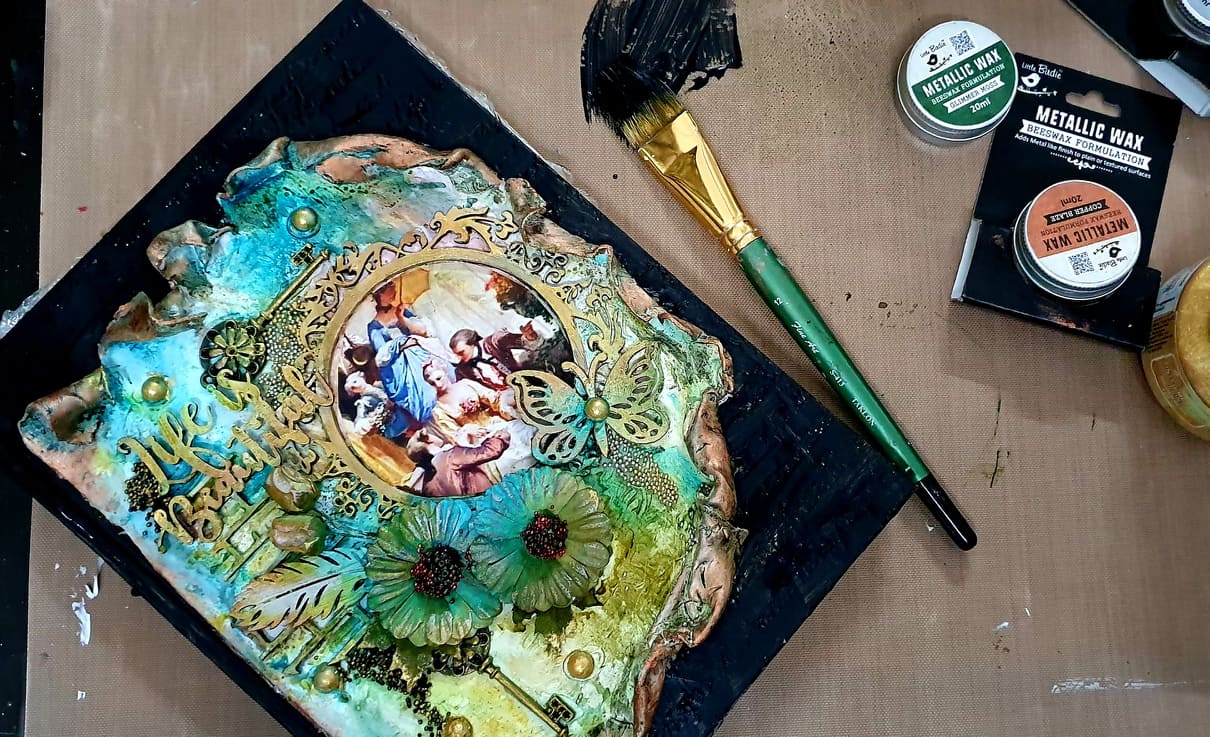
Step 8 – The colours I will be using are shades of blue, green and brown. I’ll be using spray paints for shading. Start with the darkest shade first then go on to the lighter shades. I have sprayed brown at the edges then blue on top and green on bottom and then sprayed little water to blend the shades.
Step 9 – To give little more depth to my project I have used ‘Metal Micro Beads’ in colour black, silver and red and pasted them with ‘Soft Gel Medium
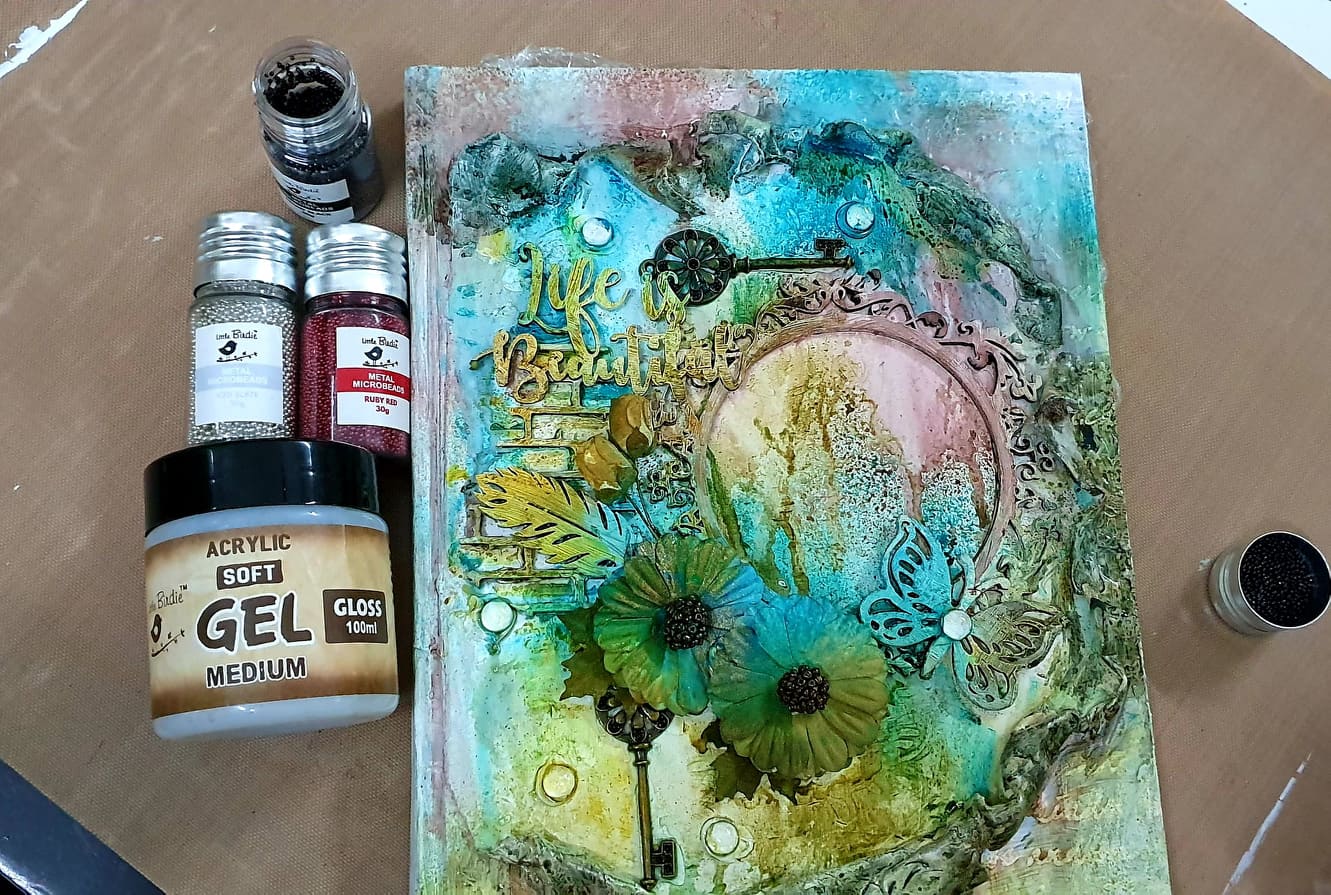
Step 10 – At this stage I decided to again colour the base black to give 3D effect.
Once the colour dried, I have used Metallic Wax in shade copper blaze and glimmer moss on all the parts that needed to be highlighted, then pasted the photo.
And here my cover is ready.
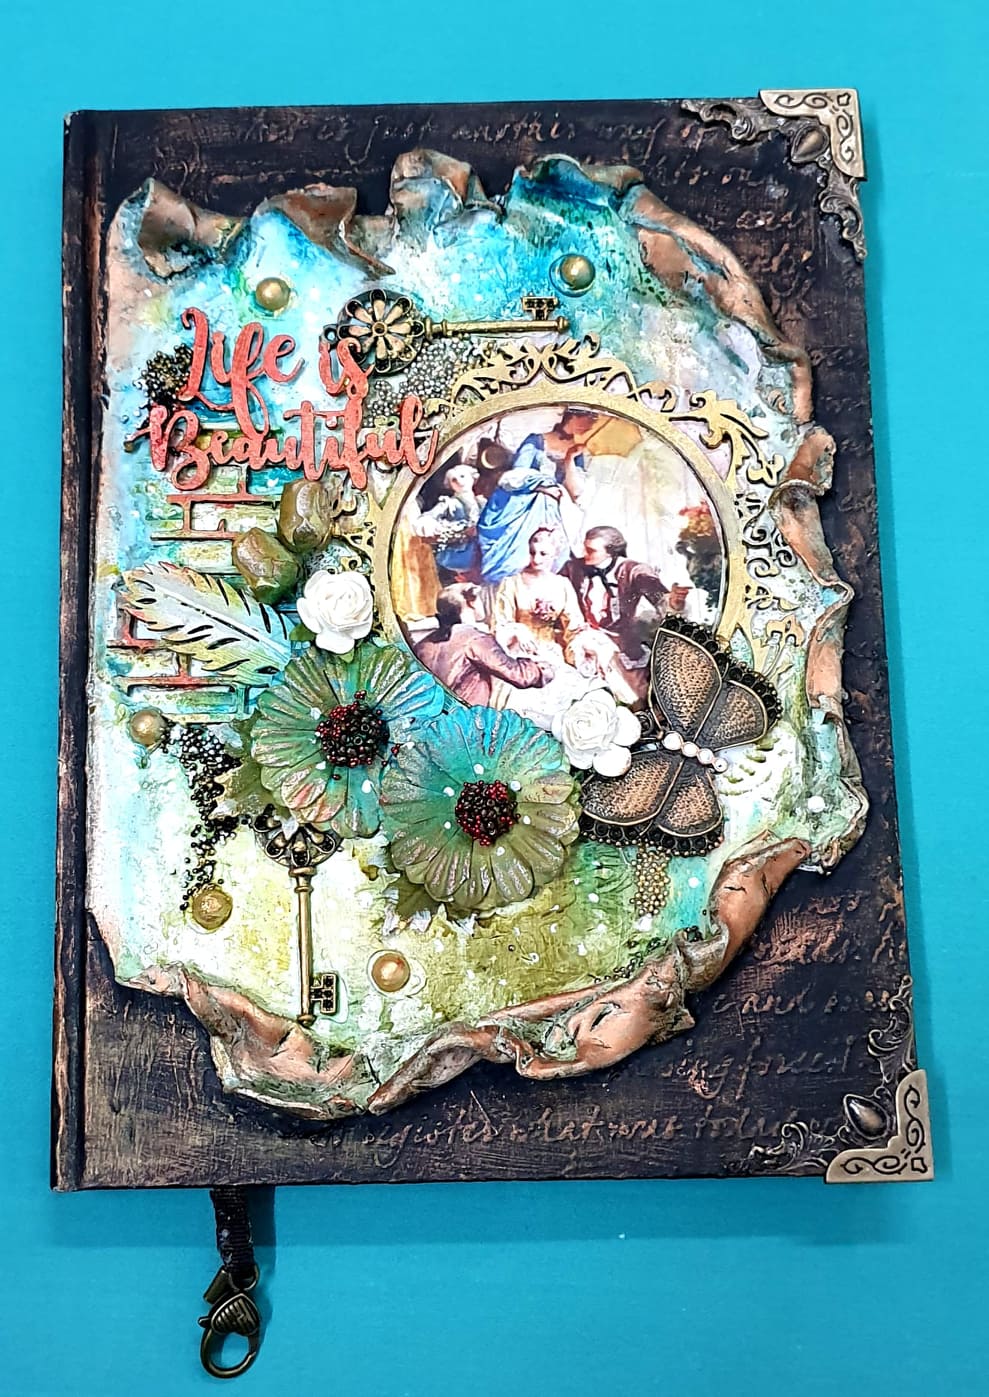
Gosh!!! I’ve fallen in love with it, what about you all??
LIST OF PRODUCTS USED
- GESSO BLACK
- GESSO WHITE
- SCRIPT STENCIL
- AIR HARDENING MODELLING CLAY – MONT MARTE
- CHIPBOARD CUTOUTS
- FLOWERS
- METAL EMBELLISHMENTS
- MICROBEADS
- SPRAY PAINTS
- METALLIC WAX
Many congrats Anju for being the CRAFTER IN THE SPOTLIGHT – ITSY BITSY!!

You will receive Rs.500/- Itsy Bitsy gift voucher & a Crafter in the Spotlight badge, which can be proudly displayed on the side bar of your blog and other platforms. Looking forward to many more creations, Happy Crafting!